Splinters are tiny, yet troublesome foreign objects that can cause significant discomfort and potential health risks if not removed properly. Whether from a wooden deck, gardening tools, or even a rough fabric, these small fragments can quickly turn a pleasant day into a painful experience. Understanding the right techniques for safe and painless splinter removal is crucial for preventing infection and minimizing discomfort.
Understanding Splinters: More Than Just a Minor Nuisance
Splinters come in various forms, including wood, metal, glass, and plant-based materials. While they might seem harmless, they can lead to serious complications if left untreated. When a splinter penetrates the skin, it creates a potential entry point for bacteria, which can cause infections, inflammation, and in rare cases, more serious medical conditions.
Why Traditional Removal Methods Can Be Problematic
Many people’s first instinct is to grab tweezers and forcefully remove a splinter. However, this approach can often:
- Push the splinter deeper into the skin
- Break the splinter, making complete removal more difficult
- Increase the risk of infection
- Cause unnecessary pain and skin trauma
The Baking Soda Solution: A Gentle, Effective Approach
Baking soda offers a remarkable alternative to traditional splinter removal methods. Its unique properties create an osmotic pressure that can help draw the splinter to the surface with minimal discomfort.
How Baking Soda Works
The magic of baking soda lies in its ability to create a mildly alkaline environment that helps soften the skin and create slight swelling. This swelling gently pushes the splinter closer to the skin’s surface, making removal easier and less painful.
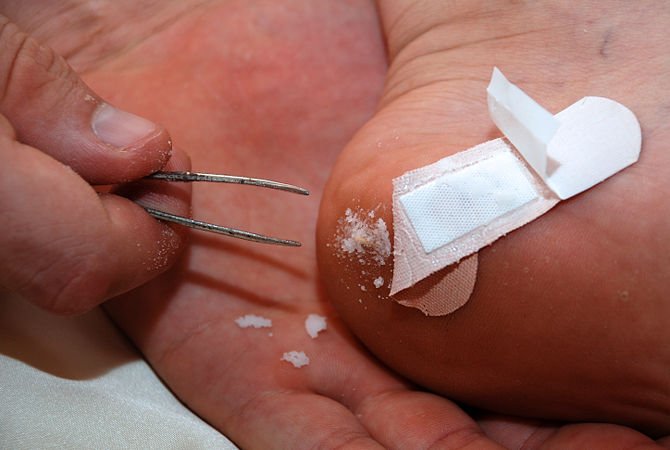
Step-by-Step Baking Soda Splinter Removal Method
- Prepare the Baking Soda Paste: Mix equal parts baking soda and water to create a thick, spreadable consistency.
- Clean the Affected Area: Wash your hands and the splinter site with soap and water to prevent potential infection.
- Apply the Paste: Spread a thick layer of the baking soda mixture directly over the splinter.
- Cover and Wait: Place a bandage or clean cloth over the paste and let it sit for 24 hours.
- Remove and Extract: After the waiting period, the splinter should be closer to the surface. Use clean tweezers to gently remove it.
Alternative Home Remedies for Splinter Removal
If the baking soda method doesn’t work, consider these alternative approaches:
- Hydrogen Peroxide: Can help clean the area and potentially loosen the splinter
- Epsom Salt Soak: Helps draw out the splinter and reduce inflammation
- Banana Peel: The enzymes can help soften the skin and promote splinter extraction
Prevention and Aftercare
After splinter removal, take these important steps:
- Clean the area thoroughly with antiseptic
- Apply an antibiotic ointment
- Cover with a sterile bandage
- Monitor for signs of infection
When to Seek Medical Help
While most splinters can be safely removed at home, consult a healthcare professional if:
- The splinter is very deep
- It’s located near a sensitive area like the eye
- You notice signs of infection (redness, swelling, pus)
- You have a compromised immune system
By understanding these gentle and effective splinter removal techniques, you can transform a potentially painful experience into a manageable, low-stress situation. Remember, patience and the right approach are key to safe and painless splinter removal.